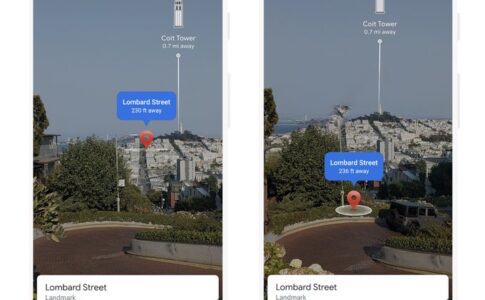
本記事は、Three.jsのAR開発シリーズ第二弾として、マーカーなし(マーカーレス)のARをTHREE.DeviceOrientationControlsを使用して実装していきます。
Three.jsのマーカーなしARでは、大きく
「シーンの用意」
「DeviceOrientationControlsの設定(カメラの視点をデバイスの傾きに同期させる)」
「背景カメラの設定(ARなので背景をカメラ映像にする)」
という3つの作業があります。
これらをひとつひとつ用意していきましょう。
▼マーカーありの実装方法についてはこちらをご覧ください
1. シーンの用意
まずはThree.jsでシーンを用意します。
一旦ARということは置いておいて、オブジェクトをお好みで配置してみましょう。
▼script.js
import * as THREE from "three";
let w;
let h;
let canvas;
let scene;
let camera;
let renderer;
let object;

const initThree = () => {
  w = window.innerWidth;
  h = window.innerHeight;
  canvas = document.getElementById("canvas");
  setScene();
  setCamera();
  setObject();
  setRenderer();
};

const setScene = () => {
  scene = new THREE.Scene();
};

const setCamera = () => {
  camera = new THREE.PerspectiveCamera(45, w / h, 0.1, 30);
  camera.position.set(0, 0, 5);
  camera.lookAt(0, 0, 0);
  scene.add(camera);
};

const setObject = () => {
  const geometry = new THREE.BoxGeometry(1, 1, 1);
  const material = new THREE.MeshNormalMaterial();
  object = new THREE.Mesh(geometry, material);
  object.position.set(0, 0, 0);
  scene.add(object);
};

const setRenderer = () => {
  renderer = new THREE.WebGLRenderer({
    antialias: true,
    canvas: canvas,
  });
  renderer.setClearColor(0x0000ff, 1.0);
  renderer.setSize(w, h);
  renderer.setPixelRatio(window.devicePixelRatio);
  renderer.setAnimationLoop(() => {
    render();
  });
};

const render = () => {
  object.rotation.x += 0.01;
  object.rotation.y += 0.01;
  renderer.render(scene, camera);
};

window.onload = () => {
  initThree();
};
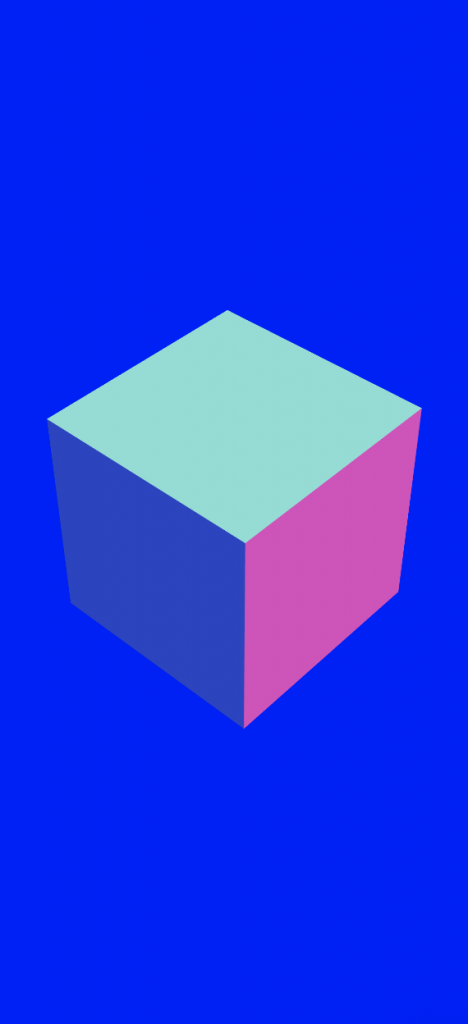
上のコードを描画すると、このようなシーンができます。
2. DeviceOrientationControls の設定
次にDeviceOrientationControlsの設定をします。
これにより、スマホの傾きに応じたカメラの視点転換ができるようになります。つまり360度見回せるようになるということですね。
以下のようにDeviceOrientationControlsをインポートして…
▼script.js
import * as THREE from "three";
import { DeviceOrientationControls } from "three/examples/jsm/controls/DeviceOrientationControls";
controls変数を用意し、DeviceOrientationControlsクラスのインスタンスを作ります。
また、毎秒呼ばれるrender関数の中でupdate()メソッドを実行します。
▼script.js
let controls;
controls = new DeviceOrientationControls(camera, true);

const render = () => {
  object.rotation.x += 0.01;
  object.rotation.y += 0.01;
  // render内でcontrols.update()を実行
  controls.update();
  renderer.render(scene, camera);
};
※Three.jsのバージョンについて
DeviceOrientationControlsの設定方法はThree.jsのバージョンによって異なります。
本記事ではv.0.126.1を使用してます。
Android端末では、ここまでの対応で以下のようにスマホの傾きと同期してカメラを動かせるようになります。

iOSの追加対応
DeviceOrientationControlsの設定を行いましたが、厄介なことにiOSではバージョンによって追加の対応をする場合が生じます。
以下の表をご確認ください。
iOSバージョンごとのデバイスオリエンテーション対応
・iOS12.1以下: Androidと同じく、追加対応なしで有効になる
・iOS12.2~12.5: ユーザーが端末の設定アプリを開き、「モーションと画面の向きのアクセス」にチェックを入れると有効になる
・iOS13以上: ユーザーのタップイベントを検知し、「動作と方向を取得するシステムモーダル」を表示&「許可」ボタンを押してもらうと有効になる
2022年8月現在はもっぱらiOS13以上のユーザーが多いかと思いますので、iOS13以上の追加対応を最低限行います。
この追加対応をする関数をcheckDeviceOrien関数とし、まず最初にAndroidの場合は(追加対応の必要がないので)弾く処理をしましょう。
ちなみに先ほど設定したThree.js側のDeviceOrientationControlsの設定・処理は、こちらのデバイスモーション取得云々が終わってから行わないとエラーになるため、checkDeviceOrien関数をPromiseで書き、結果が出てからThree.js側の処理(initThree関数)へ移行させることにします。
▼script.js
// androidを弾く処理…をここでは「iOS以外」として関数を用意してしまいます…
const isIos = () => {
  const ua = navigator.userAgent.toLowerCase();
  return (
    ua.indexOf("iphone") >= 0 ||
    ua.indexOf("ipad") >= 0 ||
    ua.indexOf("ipod") >= 0
  );
};

const checkDeviceOrien = () => {
  // Promiseで書く
  return new Promise((resolve, reject) => {
    // iOS以外(android)の場合には追加処理が必要ないのでresolveを返す
    if (!isIos()) resolve("resolve");
  });
};

window.onload = () => {
  checkDeviceOrien()
    .then(() => {
      // checkDeviceOrien関数のPromiseの結果が出てからThreeシーンの生成を行わせる
      initThree();
    })
    .catch((error) => {
      console.log(error);
    });
};さて、次にcheckDeviceOrien関数内で、Android以外でも既にスマホの傾きが取得できている端末を弾く処理を書きます。
※この時点でスマホの傾きが取得できているケース
・2回目以降のアクセス(1回目で許可された場合)
・iOS12.1以下の端末
既にスマホの傾きが取得できているかどうかはdeviceorientationイベントが取得できるかで判断します。
▼script.js
const checkDeviceOrien = () => {
  return new Promise((resolve, reject) => {
    if (!isIos()) resolve("resolve");

    const deviceOrienEvent = () => {
      window.removeEventListener("deviceorientation", deviceOrienEvent, false);
      resolve("resolve");
    };
    // deviceorientationイベントで既にスマホの傾きが取れているか確認
    window.addEventListener("deviceorientation", deviceOrienEvent, false);
  });
};
ここからiOS13以上の対応です。
iOS13以上では【ユーザーのタップイベントを検知し、「動作と方向を取得するシステムモーダル」を表示&「許可」ボタンを押してもらうと有効になる】という仕様です。
まずはユーザーのタップイベントを検知しないといけませんので、以下のようなモーダルを用意して表示させ、タップイベントを明示的に発火させましょう。
(タップのイベントが発火できればいいため、モーダルの内容などは自由です。)
「OK」をタップしたイベントをトリガーとして、傾きを取得するリクエストを出します。
▼script.js
const checkDeviceOrien = () => {
return new Promise((resolve, reject) => {
if (!isIos()) resolve("resolve");
const deviceOrienEvent = () => {
hideDeviceOrienModal();
window.removeEventListener("deviceorientation", deviceOrienEvent, false);
resolve("resolve");
};
window.addEventListener("deviceorientation", deviceOrienEvent, false);
// モーダルを表示させる
deviceOrienModal = document.getElementById("device-orien-modal");
deviceOrienModalButton = document.getElementById(
"device-orien-modal-button"
);
const alertMessage =
"モーションセンサーの使用が拒否されました。\nこのページを楽しむには、デバイスモーションセンサーの使用を許可する必要があります。\nSafariのアプリを再起動して、モーションセンサーの使用(「動作と方向」へのアクセス)を許可をしてください。";
deviceOrienModal.classList.remove("is-hidden");
// モーダルのボタンを押したイベントを取得
deviceOrienModalButton.addEventListener("click", () => {
// ここからスマホの傾きを取得するためのリクエストをする処理
if (
DeviceMotionEvent &&
(DeviceMotionEvent as any).requestPermission &&
typeof (DeviceMotionEvent as any).requestPermission === "function"
) {
(DeviceMotionEvent as any).requestPermission().then((res: any) => {});
}
if (
DeviceOrientationEvent &&
(DeviceOrientationEvent as any).requestPermission &&
typeof (DeviceOrientationEvent as any).requestPermission === "function"
) {
(DeviceOrientationEvent as any).requestPermission().then((res: any) => {
console.log(res);
if (res === "granted") {
// 許可が選択されたらモーダルを非表示にする
hideDeviceOrienModal();
resolve("resolve");
} else {
// 拒否されたらアラートを表示
alert(alertMessage);
reject("resolve");
}
});
} else {
alert(alertMessage);
reject("resolve");
}
});
});
};
// モーダルを非表示にする処理
const hideDeviceOrienModal = () => {
deviceOrienModal.classList.add("is-hidden");
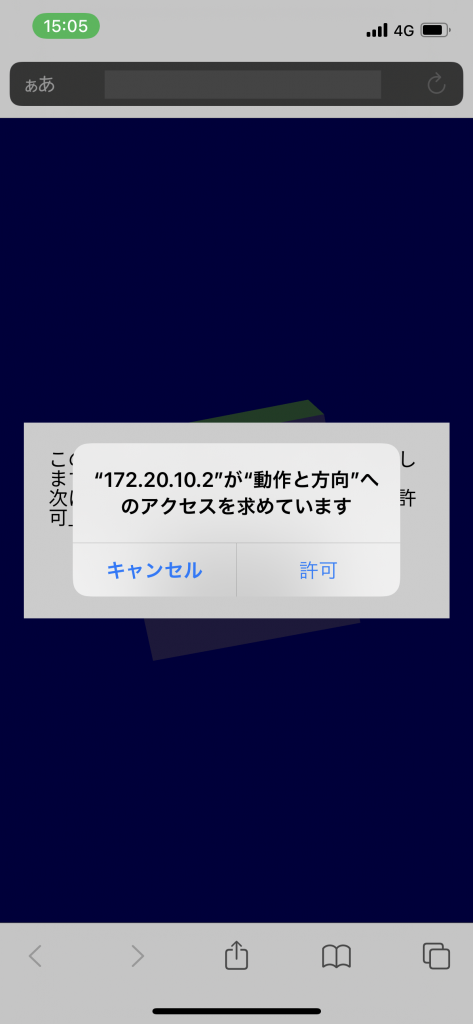
};これで「OK」ボタンの押下をトリガーに、iOS13以上ではこのようなシステム側のモーダルが表示されます。
こちらを「許可」すると初めてスマホの傾きが取得できるようになります。
ここまで行うことで、iOS、Android共に360度見回せるコンテンツになりました。
WebARではなく、WebVRを作成したい場合はここまでの処理をしておけばOK。
▼iOS12なども含め、より細かく対応したい場合は
本メディアの運営メンバーが書いたこちらの記事をご参照ください
https://zenn.dev/dami/articles/fd6650dab1490f
▼iOS13のややこしさの経緯についてはこちらの記事をご覧ください…
3. 背景カメラの設定
最後に、ARに必要なカメラ背景を用意します。
カメラ映像はThreeシーンの背景にDOMとして敷きたいため、rendererの背景を透明にしましょう。
▼script.js
const setRenderer = () => {
  renderer = new THREE.WebGLRenderer({
    antialias: true,
    // alpha: true で透過を有効にする
    alpha: true,
    canvas: canvas,
  });
  // 背景をalpha値を0(透明)に設定する
  renderer.setClearColor(0x000000, 0);
  renderer.setSize(w, h);
  renderer.setPixelRatio(window.devicePixelRatio);
  renderer.setAnimationLoop(() => {
    render();
  });
};そして、html側にvideoタグ(カメラ映像が再生されるDOM)を用意して、jsでカメラを起動する処理を書きます。
▼index.html
(playsinline要素をつけないとiOSでは再生されませんのでご注意ください)
<video src="" id="camera" class="camera" playsinline></video>▼script.js
et video = null;
let videoInput = null;
let videoStream = null;

const initVideo = () => {
  video = document.getElementById("camera");
  video.addEventListener("loadedmetadata", adjustVideo);

  navigator.mediaDevices
    .enumerateDevices()
    .then((devices) => {
      videoInput = devices.filter((device) => device.kind === "videoinput");
      getVideo();
    })
    .catch(function (error) {
      console.log(error);
    });
};

const setVideo = () => {
  return {
    audio: false,
    video: {
      deviceId: videoInput,
      facingMode: "environment",
      width: { min: 1280, max: 1920 },
      height: { min: 720, max: 1080 },
    },
  };
};

const getVideo = () => {
  if (videoStream) {
    videoStream.getTracks().forEach((track) => track.stop());
  }
  navigator.mediaDevices
    .getUserMedia(setVideo())
    .then(function (stream) {
      video.srcObject = stream;
      video.play();
      videoStream = stream;
    })
    .catch(function (error) {
      console.log(error);
      alert(
        "カメラの使用が拒否されています。\nページを再読み込みして使用を許可するか、ブラウザの設定をご確認ください。"
      );
    });
};

const adjustVideo = () => {
  const windowWidth = window.innerWidth;
  const windowHeight = window.innerHeight;
  const videoWidth = video.videoWidth;
  const videoHeight = video.videoHeight;

  let videoAspect: number = videoWidth / videoHeight;
  let windowAspect: number = windowWidth / windowHeight;

  if (windowAspect < videoAspect) {
    let newWidth: number = videoAspect * windowHeight;
    video.style.width = newWidth + "px";
    video.style.marginLeft = -(newWidth - windowWidth) / 2 + "px";
    video.style.height = windowHeight + "px";
    video.style.marginTop = "0px";
  } else {
    let newHeight: number = 1 / (videoAspect / windowWidth);
    video.style.height = newHeight + "px";
    video.style.marginTop = -(newHeight - windowHeight) / 2 + "px";
    video.style.width = windowWidth + "px";
    video.style.marginLeft = "0px";
  }
};
先ほどのPromise処理の後にカメラの準備が始まるようにします。
window.onload = () => {
  checkDeviceOrien()
    .then(() => {
      initThree();
      // カメラ準備の処理
      initVideo();
    })
    .catch((error) => {
      console.log(error);
    });
};
4. 完成
完成しました!
コード全文はこちら
▼index.html
<!DOCTYPE html>
<html>
  <head>
    <meta
      name="viewport"
      content="width=device-width, user-scalable=no, minimum-scale=1.0, maximum-scale=1.0"
    />
    <title>marker-less</title>
    <script src="./script.js"></script>
    <style>
      body {
        overflow: hidden;
        margin: 0;
        font-size: 0.9rem;
        font-family: sans-serif;
      }
      .device-orien-modal {
        z-index: 1;
        display: flex;
        flex-direction: column;
        width: 100%;
        height: 100%;
        position: fixed;
        top: 0;
        left: 0;
        background: rgba(0, 0, 0, 0.7);
      }
      .device-orien-modal-inner {
        width: 90%;
        max-width: 350px;
        box-sizing: border-box;
        height: auto;
        padding: 1.3rem;
        margin: auto;
        background: white;
        display: flex;
        flex-direction: column;
      }
      .device-orien-modal-button {
        margin: 1rem auto auto;
        padding: 0.8rem 1.3rem;
        background: black;
        color: white;
        width: 130px;
      }
      .is-hidden {
        display: none;
      }
      .canvas {
        position: fixed;
        top: 0;
        left: 0;
        z-index: 1;
      }
      .camera {
        position: fixed;
        top: 0;
        left: 0;
      }
    </style>
  </head>
  <body>
    <div id="device-orien-modal" class="device-orien-modal is-hidden">
      <div class="device-orien-modal-inner">
        <p>
          このページでは端末の向きと方向を取得します。<br />
          次に表示されるポップアップに従って「許可」を選択してください。
        </p>
        <button
          id="device-orien-modal-button"
          class="device-orien-modal-button"
        >
          OK
        </button>
      </div>
    </div>
    <canvas id="canvas" class="canvas"></canvas>
    <video src="" id="camera" class="camera" playsinline></video>
  </body>
</html>
▼script.js
import * as THREE from "three";
import { DeviceOrientationControls } from "three/examples/jsm/controls/DeviceOrientationControls";
let w;
let h;
let canvas;
let scene;
let camera;
let renderer;
let object;
let controls;

let deviceOrienModal = null;
let deviceOrienModalButton = null;

let video = null;
let videoInput = null;
let videoStream = null;

const initVideo = () => {
  video = document.getElementById("camera");
  video.addEventListener("loadedmetadata", adjustVideo);

  navigator.mediaDevices
    .enumerateDevices()
    .then((devices) => {
      videoInput = devices.filter((device) => device.kind === "videoinput");
      getVideo();
    })
    .catch(function (error) {
      console.log(error);
    });
};

const setVideo = () => {
  return {
    audio: false,
    video: {
      deviceId: videoInput,
      facingMode: "environment",
      width: { min: 1280, max: 1920 },
      height: { min: 720, max: 1080 },
    },
  };
};

const getVideo = () => {
  if (videoStream) {
    videoStream.getTracks().forEach((track) => track.stop());
  }
  navigator.mediaDevices
    .getUserMedia(setVideo())
    .then(function (stream) {
      video.srcObject = stream;
      video.play();
      videoStream = stream;
    })
    .catch(function (error) {
      console.log(error);
      alert(
        "カメラの使用が拒否されています。\nページを再読み込みして使用を許可するか、ブラウザの設定をご確認ください。"
      );
    });
};

const adjustVideo = () => {
  const windowWidth = window.innerWidth;
  const windowHeight = window.innerHeight;
  const videoWidth = video.videoWidth;
  const videoHeight = video.videoHeight;

  let videoAspect: number = videoWidth / videoHeight;
  let windowAspect: number = windowWidth / windowHeight;

  if (windowAspect < videoAspect) {
    let newWidth: number = videoAspect * windowHeight;
    video.style.width = newWidth + "px";
    video.style.marginLeft = -(newWidth - windowWidth) / 2 + "px";
    video.style.height = windowHeight + "px";
    video.style.marginTop = "0px";
  } else {
    let newHeight: number = 1 / (videoAspect / windowWidth);
    video.style.height = newHeight + "px";
    video.style.marginTop = -(newHeight - windowHeight) / 2 + "px";
    video.style.width = windowWidth + "px";
    video.style.marginLeft = "0px";
  }
};

const isIos = () => {
  const ua = navigator.userAgent.toLowerCase();
  return (
    ua.indexOf("iphone") >= 0 ||
    ua.indexOf("ipad") >= 0 ||
    ua.indexOf("ipod") >= 0
  );
};

const checkDeviceOrien = () => {
  return new Promise((resolve, reject) => {
    if (!isIos()) resolve("resolve");

    const deviceOrienEvent = () => {
      hideDeviceOrienModal();
      window.removeEventListener("deviceorientation", deviceOrienEvent, false);
      resolve("resolve");
    };
    window.addEventListener("deviceorientation", deviceOrienEvent, false);

    deviceOrienModal = document.getElementById("device-orien-modal");
    deviceOrienModalButton = document.getElementById(
      "device-orien-modal-button"
    );
    const alertMessage =
      "モーションセンサーの使用が拒否されました。\nこのページを楽しむには、デバイスモーションセンサーの使用を許可する必要があります。\nSafariのアプリを再起動して、モーションセンサーの使用(「動作と方向」へのアクセス)を許可をしてください。";
    deviceOrienModal.classList.remove("is-hidden");

    deviceOrienModalButton.addEventListener("click", () => {
      if (
        DeviceMotionEvent &&
        (DeviceMotionEvent as any).requestPermission &&
        typeof (DeviceMotionEvent as any).requestPermission === "function"
      ) {
        (DeviceMotionEvent as any).requestPermission().then((res: any) => {});
      }
      if (
        DeviceOrientationEvent &&
        (DeviceOrientationEvent as any).requestPermission &&
        typeof (DeviceOrientationEvent as any).requestPermission === "function"
      ) {
        (DeviceOrientationEvent as any).requestPermission().then((res: any) => {
          console.log(res);
          if (res === "granted") {
            hideDeviceOrienModal();
            resolve("resolve");
          } else {
            alert(alertMessage);
            reject("resolve");
          }
        });
      } else {
        alert(alertMessage);
        reject("resolve");
      }
    });
  });
};

const hideDeviceOrienModal = () => {
  deviceOrienModal.classList.add("is-hidden");
};

const initThree = () => {
  w = window.innerWidth;
  h = window.innerHeight;
  canvas = document.getElementById("canvas");
  setScene();
  setCamera();
  setObject();
  setRenderer();
  controls = new DeviceOrientationControls(camera, true);
};

const setScene = () => {
  scene = new THREE.Scene();
};

const setCamera = () => {
  camera = new THREE.PerspectiveCamera(45, w / h, 0.1, 30);
  camera.position.set(0, 0, 5);
  camera.lookAt(0, 0, 0);
  scene.add(camera);
};

const setObject = () => {
  const geometry = new THREE.BoxGeometry(1, 1, 1);
  const material = new THREE.MeshNormalMaterial();
  object = new THREE.Mesh(geometry, material);
  object.position.set(0, 0, 0);
  scene.add(object);
};

const setRenderer = () => {
  renderer = new THREE.WebGLRenderer({
    antialias: true,
    alpha: true,
    canvas: canvas,
  });
  renderer.setClearColor(0x000000, 0);
  renderer.setSize(w, h);
  renderer.setPixelRatio(window.devicePixelRatio);
  renderer.setAnimationLoop(() => {
    render();
  });
};

const render = () => {
  object.rotation.x += 0.01;
  object.rotation.y += 0.01;
  controls.update();
  renderer.render(scene, camera);
};

window.onload = () => {
  checkDeviceOrien()
    .then(() => {
      initThree();
      initVideo();
    })
    .catch((error) => {
      console.log(error);
    });
};
まとめ
本記事ではThree.jsのDeviceOrientationControlsを利用した、マーカーなしのWebARの実装方法をご紹介しました。
ぜひ参考にしてみてください。
関連記事
▼A-Frameを使用したWebAR開発記事
▼Babylon.jsを使用したWebAR開発記事


-485x300.jpeg)